There may be special occasions when you need to run Windows on your Mac, such as for gaming or work requirements. You can use Boot Camp to switch between systems.
This article will explain what Boot Camp is, and how to use it to install Windows on your Mac. Read on for more detailed instructions.
# What is Boot Camp on a Mac
Boot Camp is a free utility that Apple introduced with Mac OS X 10.5 Leopard in 2007. It's available on all Intel-based Macs and lets you install Windows on your Mac for free, allowing you to switch between macOS and the Windows operating system without deleting anything.
In addition to Windows XP and Windows Vista, Boot Camp 5.0 supports Windows 7. Later versions of Boot Camp support installation of Windows 7, 8, and later on Intel-based Macs.
However, Boot Camp Assistant is not available on Apple silicon Macs. If you have an M1 Mac, you'll need to use Parallels or another virtual machine.
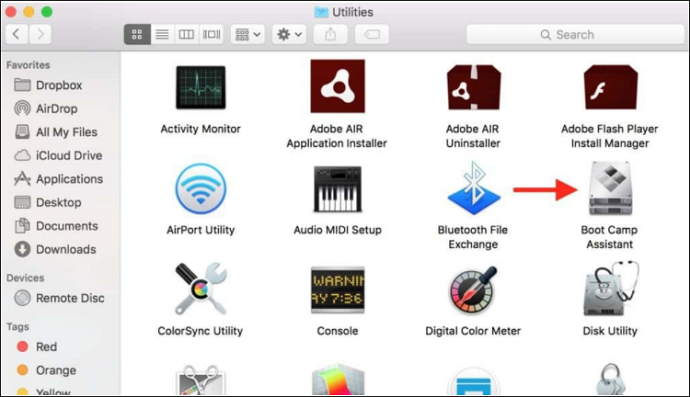
You can find Boot Camp Assistant in Applications > Utilities or the Dock on your Mac.
What are the pros and cons of installing Boot Camp on an Apple computer?
Boot Camp is a free utility for switching between systems, and it has its pros and cons. Understanding these will allow you to take more targeted measures. Let's look at the advantages and disadvantages of Boot Camp.
Advantages
- It's free and secure, and it comes pre-installed on your Mac.
- It provides a more stable experience for gaming and using resource-intensive apps.
- It includes anti-cheat software, which is required for playing certain games, like Hogwarts Legacy on Mac.
Apologies, it seems that you haven't provided any English content to be translated. Please provide a complete sentence or paragraph, and I'll be glad to assist you with the translation into Chinese.
- You can't run both Windows and macOS at the same time; it creates a partition for the second operating system.
- There's no interoperability, so you can't access macOS files from within Windows.
- The second partition that's created takes up a significant amount of space.
- After you've installed Windows with Boot Camp, you can't go back and resize the partition if you want to add more storage to your Mac.
### Preparing for Installation
1. **Verify your Mac supports Boot Camp.** If your Mac was made in 2012 or later and runs OS X Yosemite or newer, it should be compatible with Boot Camp. You can check if your Mac is supported within the Boot Camp Assistant app.
- Not all Macs support Boot Camp. For instance, Mac Minis and iMacs can't install Windows using Boot Camp. If your Mac isn't compatible, you might need to purchase virtual machine software to run Windows.
2. **Back up your Mac.** It's a good idea to back up your data before installing a new operating system. Use Time Machine (Apple's backup software) or a third-party backup app for this.
- Without a backup, you risk losing important files and data.
3. **Download the Windows 10 ISO file.** You'll need to download the ISO file from Microsoft's official website. This file will contain an installable copy of Windows.
- Open a web browser and go to .
- Click "Download tool now." This will download a small app called "MediaCreationTool."
- Double-click MediaCreationTool and follow the prompts. Choose "Create installation media for another PC," then select USB flash drive or ISO file.
- Choose "ISO file" and click "Next." Wait for the ISO file to finish downloading.
4. **Make the Windows installation media.** You'll need a USB flash drive of at least 16GB to create the installer. Alternatively, you can use a DVD.
- Insert the USB flash drive into your Mac's USB port.
- Open Finder, click the Apple logo in the top-left corner, then choose "About This Mac."
- Click "System Report," then click "Disk Utility" in the sidebar on the left.
- Select your USB flash drive from the list on the right, then click "Erase."
- Enter a name like "Windows," choose "MS-DOS (FAT)" as the format, then click "Erase."
- Open the Applications folder, double-click "Utilities," then open Boot Camp Assistant.
- Click "Continue," then check the "Create a Windows 7 or later install disk" option. Click "Continue."
- Select your USB flash drive, then click "Next."
- Wait for Boot Camp Assistant to write the Windows ISO file to the USB flash drive.
5. **Check available disk space.** Installing Windows 10 requires at least 20GB of free hard drive space. You'll need to allocate that space from your macOS partition.
- Open Finder, click the Apple logo, then choose "About This Mac." Click the "Storage" tab to see your total capacity and used space.
### Starting the Installation
1. **Restart your computer.** Press the power button, then immediately hold down the Option (⌥) key. The Startup Manager screen will appear, letting you choose which device to boot from.
2. **Select the USB flash drive.** Use the arrow keys to select the USB flash drive, then press Enter (Return). Your computer will boot from the USB drive and start the Windows setup.
- If the Startup Manager doesn't show, you may need to check your BIOS settings. Press Command (⌘)+R, then in the Recovery window, choose "Utilities" > "Terminal." Type `bless --setBoot /Volumes/Untitled` and press Enter. Restart your computer and hold down the Option (⌥) key.
3. **Choose your language.** Set your time and date, then select your country or region. Click "Next."
4. **Accept the license agreement.** Read the terms, then check the box for "I accept the license terms." Click "Next."
5. **Select the installation type.** Check the box for "Custom: Install Windows only (advanced)," then click "Next."
6. **Choose the Boot Camp partition.** From the list, select the Boot Camp partition, then click "Next."
- If you don't see the Boot Camp partition, click "Drive options (advanced)." Select your macOS partition, then click "Delete." Click "OK," then select the Boot Camp partition from the list.
7. **Wait for the installation to complete.** The process could take 10 to 30 minutes, depending on your computer's performance. Your computer will restart several times automatically.
8. **Install the Boot Camp drivers.** After the installation, Windows will prompt you to set up a user account, password, and other preferences. Once that's done, connect to the internet, then open "File Explorer."
- Click the Windows icon in the bottom-left corner, then click "This PC."
9. **Open the Boot Camp drivers disc.** Double-click the "Boot Camp" icon on the desktop and follow the prompts to install the drivers.
- If you don't see the Boot Camp icon, open File Explorer and navigate to `C:\BootCamp\Drivers\Apple`. Double-click `BootCamp.msi`, then follow the prompts.
10. **Restart your computer.** After finishing the driver installation, restart your computer. In the Startup Manager screen, select the macOS partition, then press Enter (Return).
### Using Boot Camp in Windows
1. **Install Windows updates.** Open "Settings," click "Update & Security," then click "Check for updates." Install any available updates to keep your system current.
2. **Install additional software.** You may want to install antivirus software, the Microsoft Office suite, or other common apps. You can also install games and media players.
3. ** Customize your desktop.** Change your wallpaper, colors, and themes in Personalization settings. You can also alter your cursor, screensaver, and other settings.
4. **Connect to the internet.** Click the notification center icon in the bottom-right corner, then click "All Settings." Click "Network & Internet," then click the "Wi-Fi" tab in the sidebar. Choose your network and enter the password.
5. **Use Boot Camp to switch to macOS.** Press Option (⌥)+Control (⌃)+Power (the power button). Your computer will restart and display the Startup Manager. Select macOS, then press Enter (Return).
6. **Switch back to Windows from macOS.** Press the Option (⌥) key and choose the Windows partition. Press Enter (Return) to boot from the Windows partition.
#### Tips
- If you encounter issues, visit the Boot Camp Support page at .
- Windows 10 supports DirectX 12, so you can play many games. However, not all games work with Boot Camp, so check the system requirements first.
#### Warnings
- Installing Windows will erase all data from the Boot Camp partition. Make sure you've backed up all essential files beforehand.
#### What You'll Need
- A Mac (from 2012 or later)
- A USB flash drive (16GB or larger)
- A Windows 10 ISO file
Now that you know what Boot Camp is and its pros and cons, it's time to learn how to use the tool. Let's start with the step-by-step preparations for installing Windows on your Mac.
Guide 1: Prepare for Boot Camp installation
1. Make sure your Mac is up to date, and that you have an Intel-based Mac.
2. A hard drive with at least 60 GB of free space is required. 128 GB is recommended for the best experience.
This process may take some time, so please keep your laptop charged above 60%.
Boot Camp is included with macOS. If it's not on your Mac, download Boot Camp Support Software.
5. It requires a full version of Windows, not an upgrade edition, for the initial installation.
Guide 2: Install Windows on your Mac with Boot Camp
Step 1: Download the Windows 10 ISO image file
- Navigate to the Microsoft Windows 10 ISO download page.
- Select the edition of Windows 10 you want.
- Verify your language and choose the 64-bit download, then proceed to save it.

Step 2: Use Boot Camp Assistant to create a Windows partition
- Insert the USB drive, then open Boot Camp Assistant.
Select the Windows 10 ISO image file.
Set the size of the Windows partition so you can create a bootable USB drive to install Windows.
This image depicts the Boot Camp Assistant interface, which is a tool provided by Apple to install the Windows operating system on a Mac computer. The assistant guides users through creating a partition for installing Windows and assists with the installation process.
Step 3: Format the Windows Boot Camp partition
- • After Boot Camp Assistant finishes, restart the Windows installer.
• Select the Boot Camp partition, then click Format.
Step 4: Install Windows
Click Next, and then follow the instructions on the screen to install Windows.

Step 5: Use the Boot Camp installer in Windows
- • In Windows, open the Boot Camp Installer window. • Follow the onscreen instructions to install Boot Camp and the Windows Support Software (drivers).
That's it! To switch between the two systems, hold down the Option/Alt key when you start up your Mac.
For more reading, see: How to install Windows on a Mac without Boot Camp.
Conclusions
Are you clearer now about Boot Camp on a Mac? As a free and useful tool, it has its pros and cons. It's the best choice for installing Windows on a Mac.
In addition, it provides a step-by-step guide on how to install Windows on your Mac using Boot Camp, from preparation to downloading and installation, with simple steps. We hope this article helps you understand and use Boot Camp on your Mac.