"Why is my Seagate external HDD not displaying the actual capacity? I utilize a 4TB external hard drive for creating a recovery drive and routine backups. Recently, with a new laptop, I chose to reformat the drive; however, Windows indicates that it has only 32GB available. What has happened to the remaining storage space?"
Have you ever experienced an issue where your external hard drive doesn't display its full capacity on your Windows PC or Mac? It turns out that this is a widespread problem for most hard drives exceeding 2TB, including those manufactured by Seagate, LaCie, Western Digital, or SanDisk. Indeed, it's quite normal to see a 2TB hard drive showing only 500GB, 200GB, 127GB, or even 32GB when connected to a computer. However, this issue can also affect hard drives smaller than 2TB. What causes this, and is it possible to recover the full capacity?
Why doesn't an external hard drive show its full capacity?
This usually happens when the hard drive has been initialized with the wrong partition table. As you may know, the MBR (Master Boot Record) partition table does not support disk volumes larger than 2TB. This is why owners of 3TB or 4TB hard drives often find that their available hard drive space is less than expected. To rectify this issue, you would need to convert the MBR to GPT (GUID Partition Table).
However, hard drives smaller than 2TB are not affected by the MBR limitation, so why do they still have incorrect size information? In this case, you should check the hard drive for errors.
Any issues with the driver or firmware could lead to Windows not recognizing the drive correctly. Additionally, computer viruses or a hidden recovery partition can also contribute to similar problems.
如何解决Windows中的容量错误问题 [3个修复方法]
Usually, when a storage device doesn't display the correct capacity or space on a Windows PC, the main reason for this problem is that the external hard drive's driver or firmware is outdated. Therefore, to restore the full capacity shown on your computer, Method 1 and Method 2 for updating the drive driver and firmware are highly recommended.
Fix 1: Convert MBR to GPT
We present two freely available methods for you: Windows Disk Management and the utility of a free partition manager. This video tutorial demonstrates how to convert MBR to GPT using both tools.
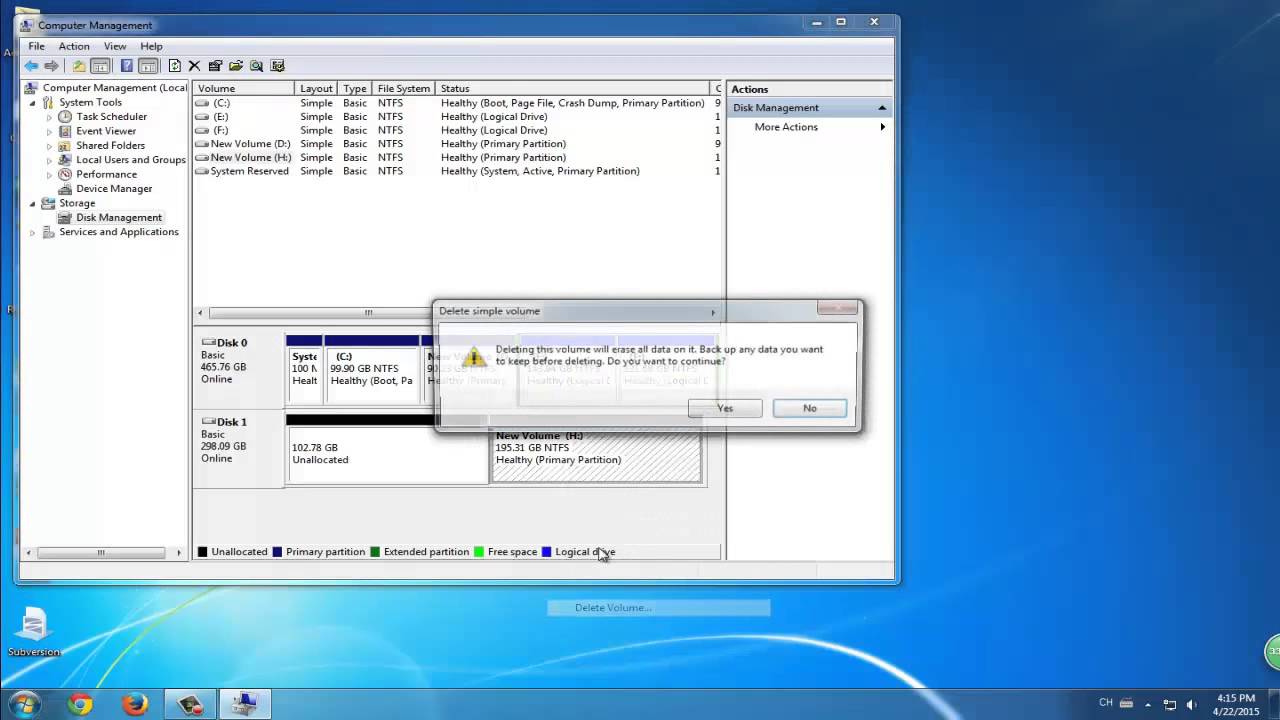
NOTE: You must first delete the partition and then initialize it as GPT in Windows Disk Management. With third-party tools like Partition Master, you can convert MBR to GPT without data loss, but this method requires downloading and installing the tool on your Windows 10/8.1/8/7 system.
Fix 2: Update External Hard Drive Driver
Step 1. Connect your external hard drive to your PC, then right-click on This PC/My Computer and select Properties.
Update the drive driver to fix the external hard drive not showing full capacity error.

Step 2: Click on "Device Manager" in the left panel and expand "Universal Serial Bus controllers."
Next, you should see a yellow exclamation mark next to the malfunctioning controller. Right-click on it and choose "Update driver" or "Update driver software".

Step 3. Click "Search automatically for updated driver software."

Fix 3. Update the firmware of the external hard drive
Step 1: Check the firmware version of your external hard drive
1. Connect your external hard drive to your PC, right-click on the Windows icon, and select Device Manager.

2. Select Disk Drives, expand it, then find and right-click on your external hard drive, and choose Properties. 3. Click on "Details" and then select Hardware IDs from the Properties drop-down list. The manufacturer and firmware version information will be displayed in the Value field.

Step 2. Download the firmware update for your external hard drive
1. Visit the website of your external hard drive's manufacturer and access the company's support page or search for driver downloads on the site. 2. Click on Support, Download, or Drivers. 3. Next, input the model number of your external hard drive or hard drive into the "Search Knowledgebase" field and look for Downloads or Model/Parts ID to locate the correct one. 4. Check for firmware updates. If there is new firmware available for your drive, click on Download, Install, or Download Firmware to download it and install it onto a portable USB drive.
Step 3: Burn the downloaded ISO and upgrade the firmware
1. Open the portable USB drive where you want to save the external hard drive's firmware ISO file. Right-click on the ISO file and choose Burn Disk Image.
2. Insert a writable CD/DVD or USB into your computer. From the Drive Burner, select the optical drive and click Burn.
3. Restart your PC with the burned disc or USB inserted. Press F2, F10, F12, or Esc to enter BIOS.
4. Use the arrow keys to select your optical or USB drive and press Enter.
5. Follow the firmware upgrade instructions on-screen. Once completed, you'll have a fully functional external hard drive with its full capacity. For added protection against hardware issues, consider using reliable cloud storage on secure hosting for data backups.
How to recover data after resizing the hard drive back to its original capacity (Windows & Mac)
If you lose your data during the process of solving the issue and you don't have a backup, download and install the tool Data Recovery Wizard to retrieve lost, deleted, or formatted data on the hard drive for free. The software is available for both Windows and Mac OS X/macOS. Download the appropriate version based on your device's operating system.
Step 1. Select and scan the external hard drive
- Translate the following text into English:
1. Download and install the Data Recovery tool on your desktop or laptop.
2. Connect the external hard drive to your computer.
3. Launch the Data Recovery Wizard and select the external drive from the External Drives list. Next, click on "Scan for Lost Data."

Step 2. Review the scan results
- Tools Data Recovery software will immediately scan the selected drive for all data, including deleted, corrupted, and existing data.
- You can use the Filter feature to quickly locate files of a specific type, such as Pictures, Word, Excel, PDF, videos, emails, etc.

Step 3. Preview and recover data
- Double-click on a file from the scan results to preview it.
- Select the files you wish to recover and click "Recover."
- Choose a different drive to save the recovered files rather than the original location.
